


This post is over three years old, the information may be outdated.
There are a lot of new students and continuing students who always face issues enrolling for the upcoming semester. As a CSU student, it’s my responsibility to help my university fellows in any matter and help to make their life easy. When I came to CSU and enrolled myself for Session 2, it was a really difficult thing to do and I would have struggled without the help of my course coordinator.
So, I thought it would be great to write a simple tutorial of how a student can enrol in the upcoming session:
1. Log onto www.csu.edu.au

2. On the home page, click ‘Current Students’ in the top menu bar:

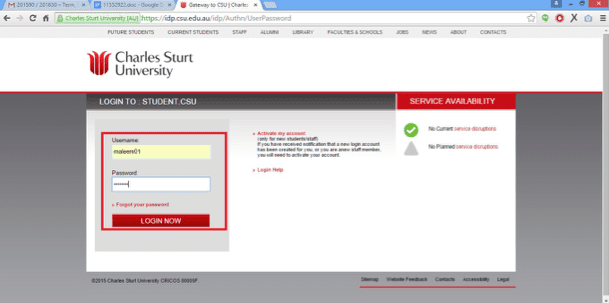
3. Enter your CSU username and password to access the ‘Student Portal’:

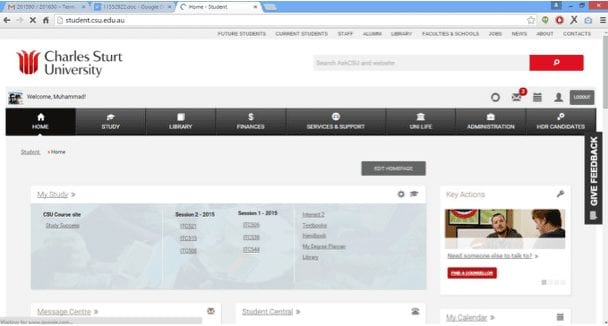
You will be redirected to the Student Portal:
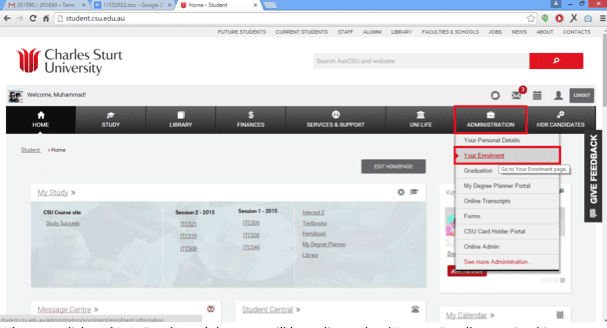
4. Go to ‘Administration’ and click ‘Your Enrolment’, to begin the process:
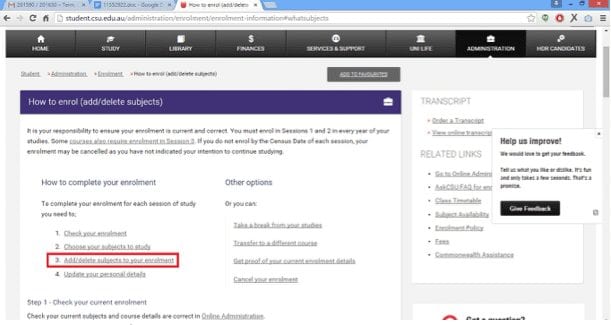
5. You will be redirected to ‘How-to-Enrol’ page, then select ‘Add/delete subjects to your enrolment’:
6. When you select ‘Add/delete subjects to your enrolment’ you will be prompted to launch ‘Online Administration’:
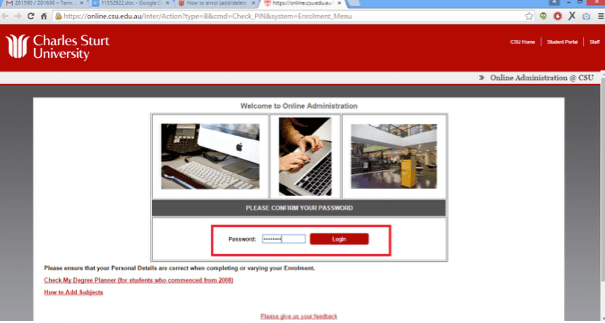
7. When you click on ‘Online Administration’, the system will ask you to confirm your CSU password again in a new tab:
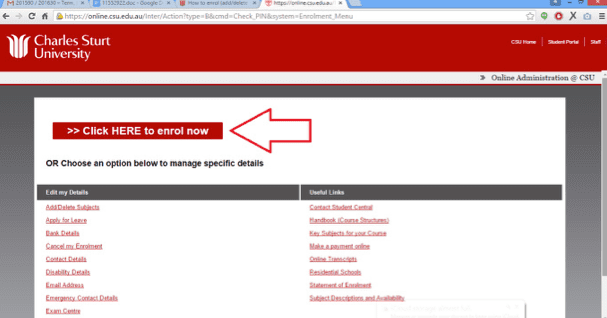
8. Now, click on the banner which says ‘Click here to enrol now’:
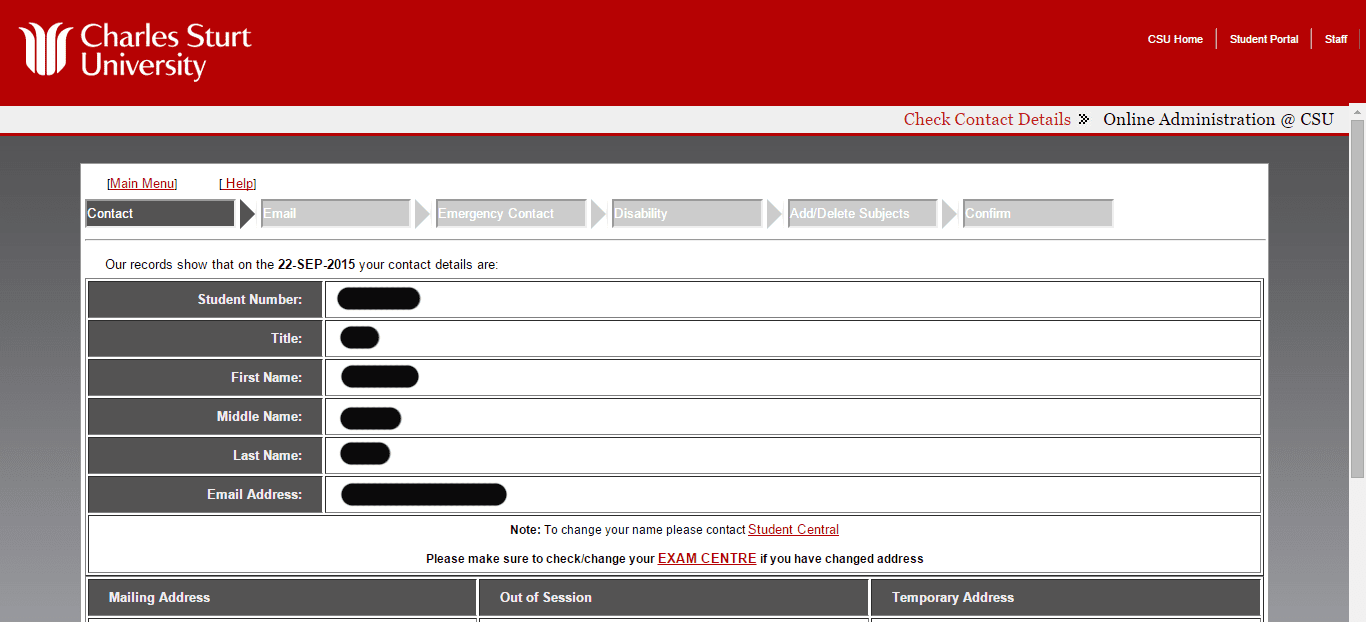
9. In next couple of pages/steps, the system will ask you to confirm your ‘Contact Details, Email Address, Emergency Contact, Disability’ and then ‘Add/Delete Subjects’:
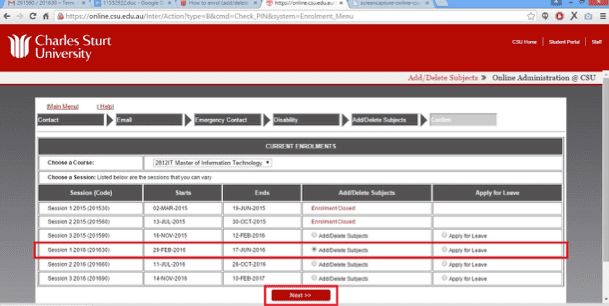
10. When you arrive on the ‘Add/Delete Subjects’ page, you need to select the session for which you are going to enrol yourself:

I am selecting ‘Session 1 2016 (201630)’ by clicking on the radio button which says ‘Add/Delete Subjects’ and click ‘Next’:
11. When you click on the ‘Next’ button, the system will redirect you to the ‘Add/Delete Subjects’ page. Now, you need to submit the details of the courses which include Subject Code, Mode and Campus. Once you are done with entering the details, then click on ‘Add Subject’:
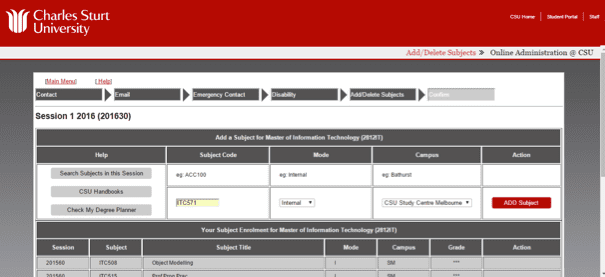
12. When you click on ‘Add Subject’ a message will be show that your requested subject has been added to your transcript. You need to repeat step # 11 if you want to add more subjects.

I have added three subjects in my transcript which you can see in the below image. You can also delete subjects from here too by clicking ‘Delete (Subject Code)’ which is present on the right side. Once you are done with the submission of subject details click on the next button at the bottom of the page.

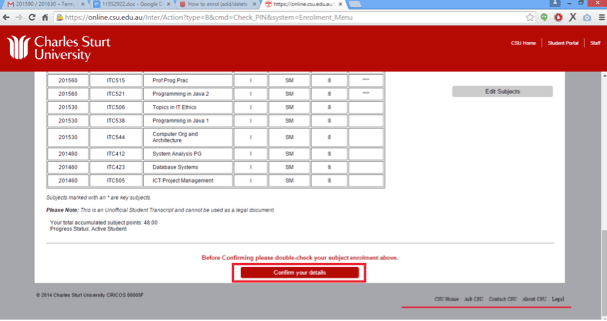
13. When you click on the ‘Next’ button, the system will show all of the details which you have added on all of the steps (Contact Details, Email Address, Emergency Contact, Disability and Add/Delete Subjects) and ask you to confirm these details. If you are okay with the submitted details then click on ‘Confirm Your Details’ button:
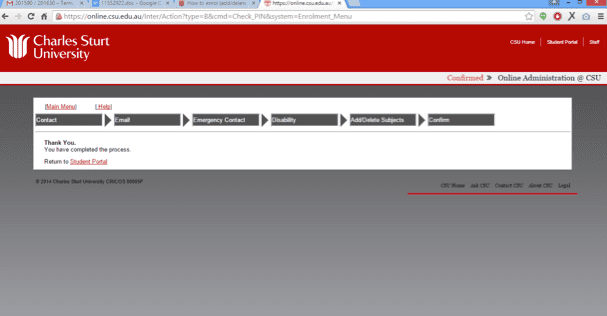
14. After confirming your details, a ‘Thank You’ page will appear with a message that you have completed the process. You can now go back to Student Portal:
I hope this tutorial will help all students who are planning on enrolling themselves for upcoming sessions. All the best with your studies!